![[The completed installation]](images/solar/DSCN2798c_512.jpg)
We add a solar photovoltaic energy system to power our pasture irrigation.
| Description | Results | Photos | Drawings | Links | Diary |
| 2/21/07 | Five years have passed. We've been tracking the performance of our system with Sunny Buddy® and noticed that the output has been dropping over the past few years. When we mentioned this to our dealer, Sierra Solar, they said that some of the Kyocera solar panels produced at the time we bought ours may be defective. Sierra Solar took our serial numbers and checked with Kyocera. Thanks to Sierra Solar and Kyocera, all our panels will be replaced at no charge. |
| 10/30/02 | PG&E sent us the "True-Up" bill for the first year of operation. This is where they reconcile the account for the year and bill us if we owe them money. As it came out, we generated slightly more than we used. Our first year of electricity was provided entirely by the solar photovoltaic system. The charts show how we did. |
| 10/26/01 | Are your lights a little brighter? Does your refrigerator hum a little smoother? Does your stereo sound a little sweeter? Rich from PG&E installs the new electric meter (photo), and connects us up to the grid (photo). |
| 10/12/01 | Final inspection by the County passes without a hitch. I send the paperwork off to PG&E and hope that they will come and change the electric meter soon. |
| 10/11/01 | Dan comes by and replaces the original DC disconnect switch with one that is rated at 600 volts DC. We examine the two switches carefully and discover that the only thing that is different is the rating label. The electrical and mechanical components are identical. The replacement switch is $30 more. |
| 10/5/01 | I receive my buydown reservation confirmation and claim form from the California Energy Commission. This document confirms that they will rebate almost half of the cost of the system after I have the final inspection and submit the required documents. |
| 10/1/01 | We discover that the DC disconnect switch is rated for only 250 volts DC. It needs to be 600 volts DC. Dan orders a new switch. |
| 10/1/01 | Dan and William come from Felix Electric to complete the installation. They connect the solar panels to the inverter (photo), install the AC and DC disconnects, run the wires to the service entrance, and test the system (photo). We "commission" the inverter and it all goes smoothly. During the course of testing we discover that my electric meter runs forward when we deliver electric power to the grid. Not only are we delivering power to PG&E, but we are paying them to take it. We will have to wait until PG&E comes to change the electric meter before we can run the system and collect any power credits. |
| 9/30/01 | I discover that the Sunny Boy inverter display and the RS-232 Communication Module are mutually exclusive. I can have either one, but not both. This is not explained in any of the literature, nor was Sierra Solar aware of this. This is a disappointment as I was looking forward to using the RS-232 Communication Module connected to a computer to capture detailed data about the system. I leave the display in the inverter and decide to wait until later to make a decision about whether or not I want to use the RS-232 Communication Module. |
| 9/28/01 | With the panels covered, I strip the wire and make the connections in each of the solar panel terminal box (photo). This step goes fairly quickly because I had previously strung the wire between the boxes (photo). |
| 9/27/01 | Before making any connections to the solar panels, I cover them. This prevents the sun from reaching the panels and generating electricity. Since the panels are to be wired in series, even a small amount of electric current in each panel could add up to a lethal shock. My first attempt at covering used the cardboard from the solar panel boxes. This worked fine until the morning dew dampened the cardboard and caused it to warp. By noon, all the cardboard covers had fallen off. My next attempt was to tape 4-mil black plastic over the solar panels. This looks like it's going to work. |
| 9/24/01 | I pick up the RS-232 Communication Module at Sierra Solar. This is a small circuit card that is installed in the Sunny Boy Inverter. It lets me connect a computer to the inverter to capture detailed data about the inverter's performance. However, the module did not arrive with a cable. This causes great confusion because it is not readily apparent how one is to connect the computer without a cable. Sierra Solar offers to research the problem. In the meantime, Chris comes up with the answer. It seems that the computer cable does not attach directly to the circuit board, but to a terminal strip inside the Sunny Boy Inverter. I'll still have to make a cable, but at least there is a place to attach it. |
| 9/21/01 | I am wiring the solar panels. I string the insulated VNTC through all the panel junction boxes. I make a loop in each box and strip the outer sheath from the wire, exposing the two insulated 10-gauge wires. I do this for all the panels before exposing any bare wire and making any connections. It would have been easier to prepare the solar panel junction boxes before mounting the panels to the racks. The steps are to unscrew the box cover, remove the knockout plugs, and insert the retaining plugs. This leaves stringing and stripping the wire after mounting. |
| 9/17/01 | I select the electrical contractor to do the final installation. The contractor had the most experience in doing solar installations and gave the lowest quote. I think the prices quoted by the contractors are a function of how confident the contractors were with the job and how well they understood what was needed. The next step is getting on the contractor's busy schedule. |
| 9/17/01 | Chris and I mount the rest of the panels and adjust the angle of the rack. We made the mistake of adjusting the angle after mounting the panels. The racks are very heavy with all the panels and it's difficult to make the adjustment. We should have made the angle adjustment before mounting the panels. We decide to set the angle to 45-degrees. We are at 39 degrees latitude, so this is a compromise between ideal summer (24 degrees) and ideal winter (54 degrees). |
| 9/14/01 | I add more panels to the racks and make an interesting discovery. The spacing between the holes on the rack and the spacing between the holes on the panel are not exactly similar. One cannot start installing panels at the top or bottom of the rack and expect all the panels to fit. The best method was to start with the second panel from the bottom and add panels from there. |
| 9/12/01 | Chris and I complete the bolting of the struts to the roof. We assemble the remaining racks and attach a solar panel to each (photo). |
| 9/12/01 | The sixth and final electrician comes by to talk about the project. He expects to send me his quotation this weekend. |
| 9/7/01 | Chris helps bolt the remaining struts to the roof. We run out of 3/8-inch-diameter washers which causes us to pause and reflect on the refreshing nature of bubbly brews (photo). |
| 9/6/01 | The County Building Inspector returns my call about wiring. He says the VNTC is acceptable. It must be protected against damage, but does not require conduit or other armoured covering. |
| 9/5/01 |
Chris comes to help mount the racks on the barn roof.
We work with the layout of the racks until we convince ourselves it's perfect.
Then we drill holes and bolt the struts to the roof purlins and attach the racks to the struts.
Here is a sketch of the roof bolting.
It all lines up beautifully and we work out a system that we can replicate for the remaining racks.
The fifth electrician comes by. Each electrician suggests a different way to do the job. I change my plan after talking with each electrician and finally come up with a plan that is surprisingly like the original wiring diagram. It consists of the following:
|
| 9/2/01 | Each rack holds 4 solar panels. Here is a sketch of one of the racks. I assemble 2 racks on the barn roof to try the layout. The slotted strut is going to work perfectly for mounting the racks to the barn roof purlins. The moment of truth will come when I drill the holes in the barn roof and bolt down the struts. |
| 9/1/01 |
I draw a simple wiring diagram.
The first solar panel is connected to the black and red conductors in the VNTC. The VNTC is daisy-chained through the remaining 23 panels with only the red wire cut and connected. The end of the cable is run through plastic conduit and connected to the inverter. This puts all the panels in series. |
| 8/31/01 |
I talk with 4 of the 6 prospective licensed electrical contractors about the job.
It looks like the best way to wire the panels is with 10-gauge VNTC.
This is a UV-resistant outdoor black-vinyl 2-conductor cable.
It's used for connecting the solar panels.
It also works with the IPON connectors (the black plastic "compression fittings") provided with the panels.
Fortunately, Sierra Solar sells the wire by the foot so that I don't have to buy a 1,000-foot spool.
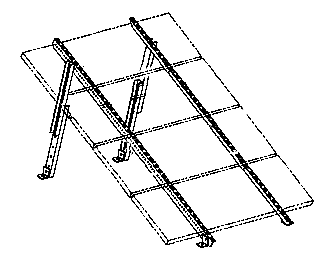
Kent comes by to help me with the full-size mock-up. We work in the early evening when the barn roof is out of the direct sun and it's cooler (photo). |
| 8/30/01 |
I visit a fourth, recently-completed solar installation.
It has a 20-panel solar electric system with a Trace inverter.
The Trace requires the panels to be wired in 4-panel groups.
This is a series-parallel installation in which 4 panels are wired in series.
The 48 vdc from each 4-panel group is then routed to the inverter in parallel.
My installation uses a Sunny Boy inverter which requires that the panels all be wired in series. It's a simpler and more efficient design, but more dangerous to install because of the high voltage (up to 400 vdc). |
| 8/29/01 |
I have all the materials in hand for installing the solar electric system.
To learn more about these things, I find other people that have already done it. I visit 3 solar installations. I find them by doing a search of the county building permits. All three installations are complete. Two are connected to PG&E and the third is awaiting a visit by PG&E. One installation uses a 12-panel array on an active tracker. It has two large, 5500-watt Trace inverters and a dozen big batteries. They also have the old-fashioned electric meter. The kind with the rotating wheel and dials. It's fun to watch the meter rotate, stop, backup, and then continue forward depending on the electric load. I finally see net metering in action. I plan to install the solar panel arrays on the barn roof, but the roof is corrugated steel held up by steel purlins. A friend suggests Unistrut, a versatile slotted channel. It's a 1-5/8 inch square channel with a slot down its length. I can install the channel slot-up in the roof valley, bolt the channel through the roof to the purlins, and bolt the solar array rack to the channel. I find a local distributor for Superstrut, a Unistrut competitor. It's cheaper and they deliver. My next step is to build a full-size mock-up of the solar array. I'll use that to verify my paper design before permanently mounting the slotted channels ("struts"). |
| 8/16/01 | I go to the Nevada County Building Department to request a building permit for my "Solar Photovoltaic System". It turns out that the permit is "over the counter". This means I don't need a site plan or plan review. There is also no additional assessment or taxes. I pay my fee and take a building permit home with me. |
| 8/14/01 | The first of my order arrives at Sierra Solar and I pick it up. |
| 8/6/01 | Gave Sierra Solar a deposit for a Solar Photovoltaic Net Metering system. It includes 24 120-watt Kyocera solar panels, Unirac mounting racks, and a SMA Sunny Boy inverter. |
| 6/2/01 | Attend an all-day Solar Workshop conducted by Sierra Solar. The workshop prompts me to fill out and send in the Application and Agreement for Schedule E-NET to PG&E. |
| 3/30/01 | Received a reply from PG&E about Net Metering. |
| 2/26/01 | Started trying to contact PG&E about Net Metering. |
| 2/22/01 | Got a quotation from Sierra Solar for a Solar Photovoltaic Net Metering system. |


